

This tut is made in Photoshop CS2. It requires you to have Image Ready, which is supplied with PS CS2, but I am not sure about other versions. You also need Super Blade Pro.
** Edited: I've included the layer style into the zip file for those who can't use Image Ready. The supply zip has been reuploaded.
Supplies:
SK Wand
Gold SBPro Setting -- Place the two .bmp's and the IsbGold017.q5q file into your environments and textures folder of your Super Blade Pro. This setting is not mine, but the owner allows sharing of her files. Check out her site, Dragonzgold.com she has some really great SBPro presets.
All of which you can get from the supplies zip HERE
* First well set up PS to make a rounded, 5 sided star.
1. Open up 400 x 400 transparent image
2. Right click on the preset shapes tool on the left and choose polygon
3. Along the top you will see what looks like a blobby star with an arrow pointing downward. That's your polygon options in there. Click the down arrow and set your options like in the picture below:
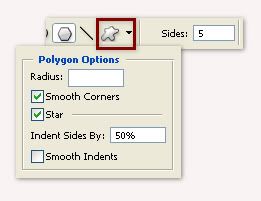
4. Right beside the blobby star icon, you will see "Sides". Put a 5 in there. At the far left, there is 3 icons below the Layer tab, click on the last one that says Fill Pixels. Set your Opacity to 100% and check Anti-alais.
5. Next, you are going to hold down your shift key and place your cursor at the top left of your canvas, and drag out your star. You will notice that it is going to look like part of it is off of your screen. That's ok, we're going to fix that. Keep holding down your shift key, and now hold down your spacebar on your keyboard, and move your cursor to the middle of your page. Your star will move with it and you can continue to draw out your shape. That takes a little practice, so if you make a mistake or let go of your shift key accidently, just go up to the Edit tab, click Undo or Step Backwards and try it again.
* Now you have your basic star topper. Time to put a layer style on it.
6. Look over to your left at the very bottom of the tool bar you will see what looks like 2 square pieces of paper, one with an arrow, the other with a feather. That is Image Ready. Click it once and it will take your star shape over there. Don't close out Photoshop though, we are not done in there yet.
* On the right, you will see this box:
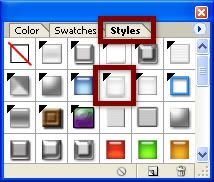
7. Click the Styles tab if it isn't already showing you the styles.
8. We are looking for the white style called Clear Gel Rollover Button. If you don't see it in your styles palette, there is a small circle with an arrow pointing to the right at the top right of the palette. Click that, then scroll down and click on Reset Styles. If you get a popup box saying resetting styles cannot be undone, click yes. You should now have all the same default styles that are in the picture above.
9. Go ahead and click on the clear gel rollover button style.
* Your star should now look like this:
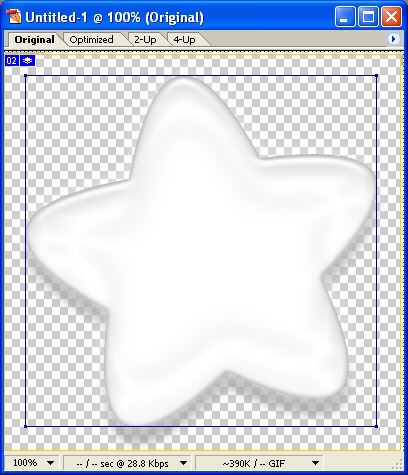
* We don't want that big drop shadow on it, so we need to take that off.
10. Look at the bottom of your layers palette and you will see a grey circle with the letter f in it. See picture below:
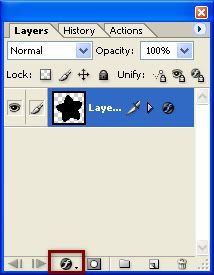
11. Click that icon then click on drop shadow from the list.
12. Click the green checkmark beside the words drop shadow and it will disappear from our star.
* It is hard to see against the grey and white checkered background, but the star also has a white glow around it, and we are going to take this off as well.
13. Take the checkmark out of the section that says Outter Glow, and hit the OK button to finish.
14. Look to your left again and find the icon of the 2 papers with the arrow and feather. Click that once and it will bring our star back into photoshop with the layer style intact.
* We are done with Image Ready so you can close that out now.
* At this point, you should save this as a .png file so you can use it later on to recolour and you won't have to make another one each time.
15. So, to do that, go up to the File tab, choose Save As, scroll down and find the .png option and select it. Give your star a name and hit Save.
* Once it is saved as a .png file, you don't need the original any longer so you can close that out.
16. Open up the new star .png image you just saved, then go up to the Image tab at the top, and down to Duplicate. Now close out our original .png star and work on the duplicate image.
* Now we are going to recolour it.
17. Go up to the Layer tab, then to New Adjustment Layer, then to Hue and Saturation.
* Click ok at the popup box.
18. On the bottom right of the Hue/Saturation box, you will see the word Colourize. Put a check in that box, and if there isn't already, put a check in the Preview box as well.
19. Now just start moving the sliders around till you get a look that you like.
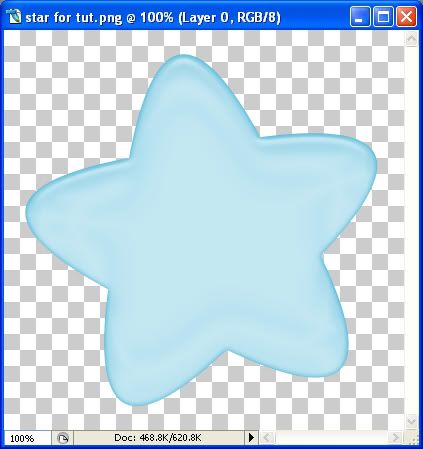
To get this blue colour:
Hue: 194
Saturation: 64
Lightness: -8
20. When you find a shade you like, hit OK.
21. In the layer palette, right click on one of the layers and choose Merge Visable.
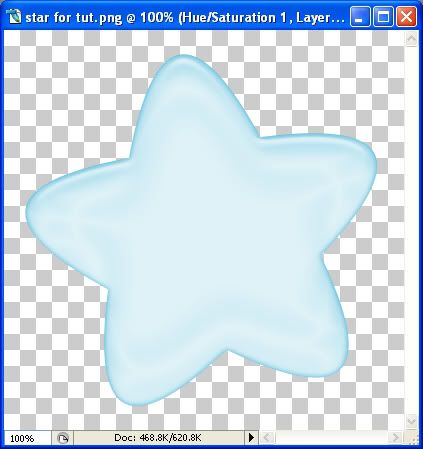
** You can also do a bit of playing around here by, after merging your two layers, go back up to Step #17 and play with the Hue/Saturation settings to get a darker shade of whatever colour you have chosen. In the example below, I merged my two layers, went back and used the exact same hue/sat colour settings as before and got a darker blue;
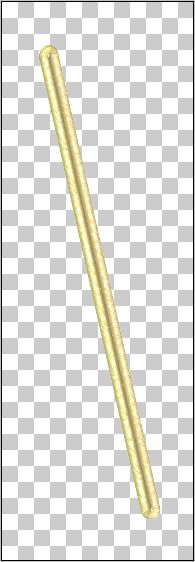
Now on to the wand stick. This part requires you to use Super Blade Pro.
22. Open up SK Star Wand Stick from the supplies zip.
23. Go up to the Image tab and click on Duplicate and then close out the original.
24. You'll notice in the bottom left corner of the canvas, photoshop has shrunk our image down to 66.67%. Just backspace out those numbers and type in 100% and drag out the canvas to get the full view.
25. Hold down your Ctrl key on your keyboard and click with your cursor on the icon of the stick in your layer palette. Make sure you click on the ICON and not just on the layer itself.
* Marching ants will appear all around your stick.
26. Go up to the Filter tab at the top, then down to Flaming Pear and over to Super Blade Pro. The setting I am using for this is called IsbGold017. Click the icon indicated by the red box in the photo below and find the IsbGold017. Click it once to select it then click the Open button.
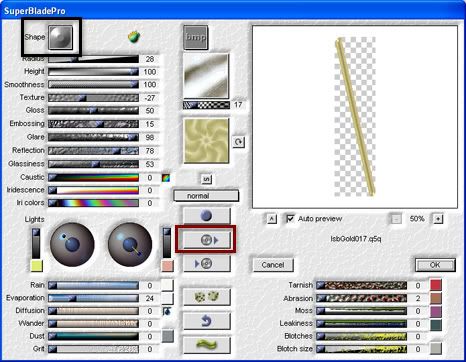
27. Now, up at the top left corner you will see the word Shape. It is indicated by the black box in the picture above. Click the grey round circle next to it and then click the very first grey circle icon from that list.
28. Now hit the OK button.
29. Now go up to the Select tab and click Deselect. Your wand should now look like this:
* All that is left to do is put the star topper on the stick so...
30. Click the star once to make it our active layer. On the left, click on your mover tool (it's at the top of your tool options on the left)
31. Now, in the layer palette put your cursor on the star icon and drag it over onto the gold wand layer. Use the mover tool again to push it into place on top of the wand.
32. In the layers palette, right click on one of the two layer and choose Merge Visable.
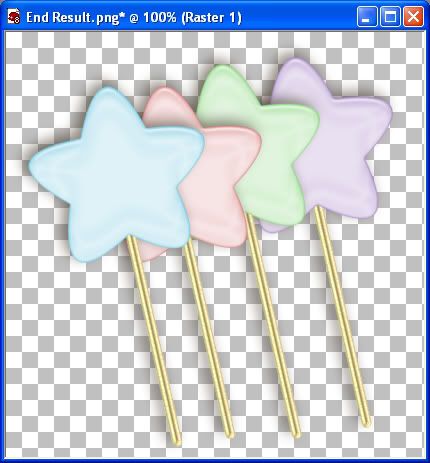
That's it, you're done :)
TOU:
If you do this tutorial, your end result is yours to do whatever you wish; give it away as a freebie, use it as part of a kit, or sell it for profit. You may not make this into an action or script to give away as a freebie or to sell for a profit. A mention or a link back here would be appreciated but is not mandatory. Please do not share the supplies or tut through email or any other means. If you are using this or any of my tutorials for your groups or as part of your own tutorial, please post a link to the tut on my blog and let your members download the supplies from my blog for themselves.
Thanks Misty from MissT Layouts for testing out my tutorial :)


I love these so much. If you struggled replicating them in PSP then I'm not sure how I'm going to go on but one thing is for sure I'm going to try really hard to get there.