
Supplies: Download zip file HERE
1. Open up a 500 by 500 transparent image.
2. Right click on your Custom Shape tool on the left and choose Custom Shape Tool.
3. Look up at the options bar along the top. Click on the icon that says Fill Pixels. See picture below

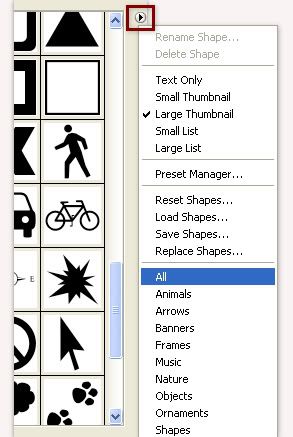
4. Next click on the drop down arrow next to the word shape and find your circle. Make sure it is a solid circle and not just an outline of a circle. Double click it to select it. Opacity is at 100% and Anti-alias is checked.
* If you don't see a solid circle in your shapes list, click the arrow in the top right corner of the shapes drop down box and from that flyout, select All.
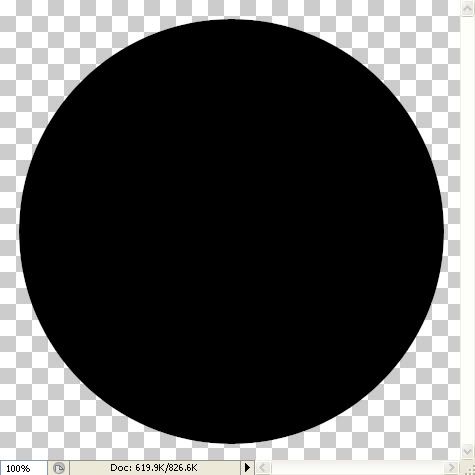
5. Hold down your Shift key on your keyboard and starting from the top left corner, drag out your shape. Leave room at the top, bottom and edges.
6. Open up SK Green for Tutorial.jpg from the zip file.
7. Click on your mover tool on the left. It looks like an arrow pointing to the left.
8. In the layer palette, hold your mouse down on the ICON of the green paper and drag it over and onto your black circle canvas.
* You should now have your green paper layer on top of your black circle.
9. Close out the green paper, we no longer need it.
* What we are going to do next is create what is called a Clipping Mask. It is going to mold the green layer onto our black layer into whatever shape is on the layer below it. In this case, it's our circle.
10. Hold down your Ctrl key, hold down your Alt key and then hit the g key on your keyboard.
* You now have your circle shape covered in your green paper.
11. In the layer palette, right click on one of the layers and choose Merge Visable.
* Now we need to cut out a circle for our middle part of the button.
12. On the left, click on your Elliptical Marquee Tool. It is the first tool in the list. If you have something other than the elliptical marquee showing, right click on the icon and find it in the dropdown list.
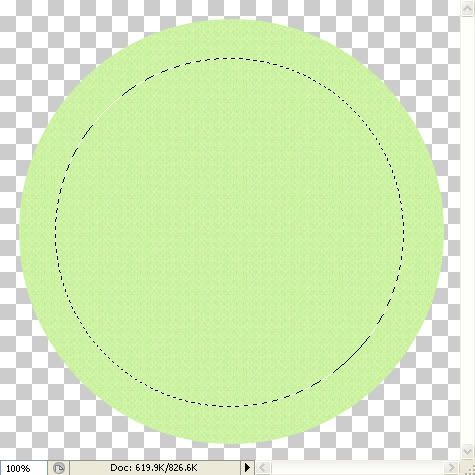
13. Along the top in the settings bar, click on the icon labled New Selection then put the rest of your settings like the picture below:

* This is a bit tricky and might take a couple practice trys to get it right. If you make a mistake, use your undo button under the Edit tab.
14. Starting from the top left corner, hold down the shift key and drag out your shape. Don't let go of your mouse, but if you hold down the spacebar, you can move the elliptical circle and place it in the middle of your button shape.
15. Once you've got it centered in the middle, go up to the Edit tab and choose Cut. Then go back up to the Edit tab and choose Paste.
* It will paste your selection back into the middle of your circle, although it isn't exactly centered properly.
16. Click on your Mover tool on the left and then use the arrow keys on your keyboard to nudge the middle section back into place.
17. So now your have in your layer palette an inner circle and an outter circle. Rename each of these inner and outter circle, then drag the outter circle layer on top.
* To rename the layers, just double click on the layer itself, not on the icon and give it a name.
18. Click on the layer named outter circle to make it active. Now click on the Layer Style icon at the bottom of the layer palette. It looks like a circle with an f in the middle. Choose Inner Shadow.
19. Change the blend mode to colour burn, the opacity to 100%, the distance to 0, and the size to 21 and hit ok.
20. Click on the inner circle layer in the layer palette then click on the Layer Style icon at the bottom, and again choose inner shadow. Change your settings to these:
Blend Mode is colour burn, colour is black
Opacity is 75%
Angle is 120 and global light is checked
Distance is 0
choke is 0
Size is 128
Leave the rest at it's default settings and click OK.
* You should have what looks like this now:
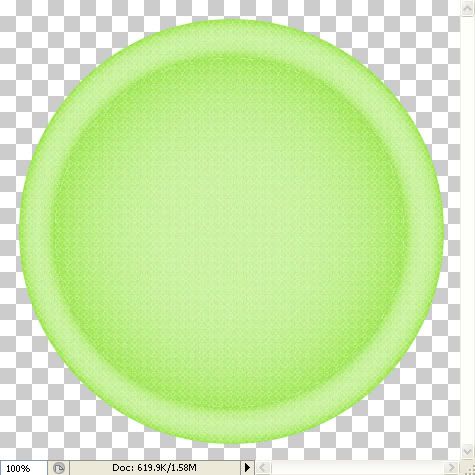
* Now, we need to make our button holes.
21. We need our circle again, so click on the Custom Shape tool again. Use the same settings as before.
22. Go up to the Layer tab and choose New and then Layer and move this to the top in your layer palette.
23. Turn off your outter layer so it is easier too see what we are doing. And set your foreground to black as that is the easiest colour to see as well.
24. Hold down your shift key and draw out a small circle the size you want your button holes to be. Here's mine:
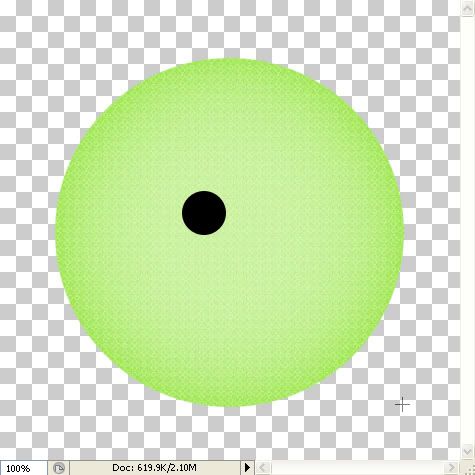
* It doesn't matter if it isn't centered, we'll do that in a bit.
25. In the layer palette right click on your first button hole and choose Duplicate Layer.
26. Click on your Mover tool to select it, then use your arrow keys on your keyboard to move the second hole over to the right a bit.
* You now have 2 black button holes.
27. Turn off both the inner and outter circle layers then right click on one of the remaining button hole layers and from the flyout choose Merge Visable, then turn the inner circle layer back on.
28. In the layer palette, right click on the merged button hole layer and choose Duplicate Layer.
29. Again, click on the mover tool and use the arrow keys to move these two holes down below our other two.
* Make sure that they are evenly spaced with each other.
30. Turn off your inner circle layer in the layer palette, and right click and merge these two button holes with the first button hole layer.
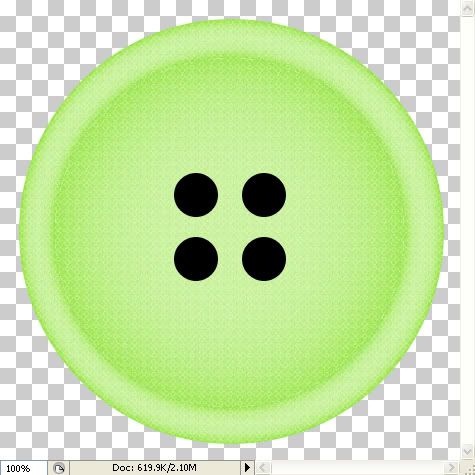
* Now we need to move and center our button holes layer.
31. Click on your Mover tool and use your arrow keys to center the holes in the middle of the inner circle layer. You may want to turn on your outter circle layer to see the whole button. Here's mine so far:
32. Click on your button hole layer in the layer palette to activate it, then hold down your Ctrl key on your keyboard and click once on the ICON of the button hole layer.
* Your holes should now have the marching ants all around them.
33. Hit the Delete key on your keyboard, then click on the inner circle layer in the layer palette and hit the Delete key on your keyboard again.
34. Go up to the Select tab and choose Deselect.
35. Delete the layer from the layer palette that used to have the button holes on them.
* Now we need to put an additional layer style on these with different settings, so we need to merge the existing one with it's layer.
36. In the layer palette, turn off the inner circle layer. Go up to the Layer tab and choose New, then Layer.
37. Right click on the new layer and choose Merge Visable.
* You'll notice that the burned edges are still there, but the little circle with the f in it is gone from our layer in the palette. We merged the settings with our paper.
38. Turn off the outter circle, turn on the inner circle and do the same for this. Make a new layer then merge visable.
39. Turn on both layers, and click on the outter circle in the layer palette.
* We need to put on a bevel and emboss which is what makes the button look like it is plastic with a shine.
40. Click on the Layer Style icon and choose Bevel and Emboss. Use these settings:
Style is inner bevel
Techniques is smooth
Depth is 121
Direction is up
Size is 13
Soften is 0
Shading:
Angle is 104 and global light is checked
Altitude is 71
Highlight Mode is screen
colour is white
opacity is 100
Shadow Mode is overlay
colour is black
opacity is 100
Click the OK button.
41. Click on the inner circle layer and go to the Layer Style icon and choose Bevel and Emboss.
Style is inner bevel
Technique is smooth
Depth is 81
Direction is up
Size is 13
Soften is 0
Shading:
Angle is 104 and global light is checked
Altitude is 71
Highlight Mode is Screen
Colour is white
Opacity is 90
Shadow Mode is Overlay
Colour is black
Opacity is 100
* Now, i went and added a bit more shading using the Inner Shadow setting again. This is optional.
Click on the Inner Shadow and use these settings:
Blend Mode is overlay
colour is black
opacity is 75
angle is 104 and global light is checked
Distance is 0
Choke is 0
Size is 6
Click the OK button. This is what mine looks like:
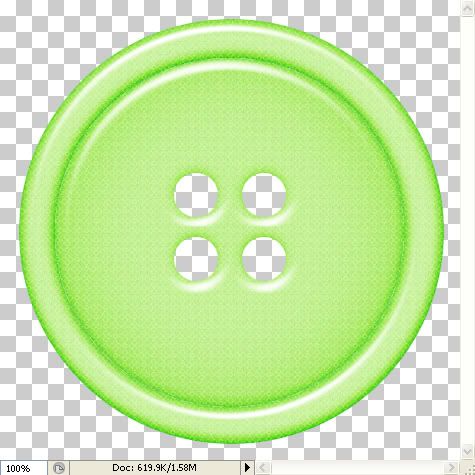
42. Right click on one of the layers and Merge Visable.
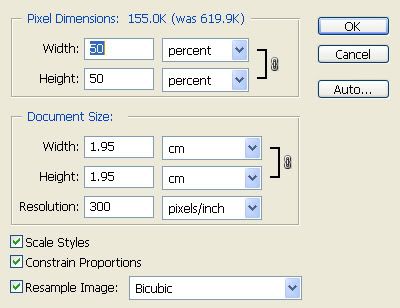
43. To resize your button, go up to the Image tab then to Resize Image. See the picture below for my settings.
TOU:
If you do this tutorial, your end result is yours to do whatever you wish; give it away as a freebie, use it as part of a kit, or sell it for profit. You may not make this into an action or script to give away as a freebie or to sell for a profit. A mention or a link back here would be appreciated but is not mandatory. Please do not share the supplies or tut through email or any other means. If you are using this or any of my tutorials for your groups or as part of your own tutorial, please post a link to the tut on my blog and let your members download the supplies from my blog for themselves.
Thank you Misty from MissT Layouts for being my tut tester and finding my mistakes :)

Thank you for sharing you tut.