
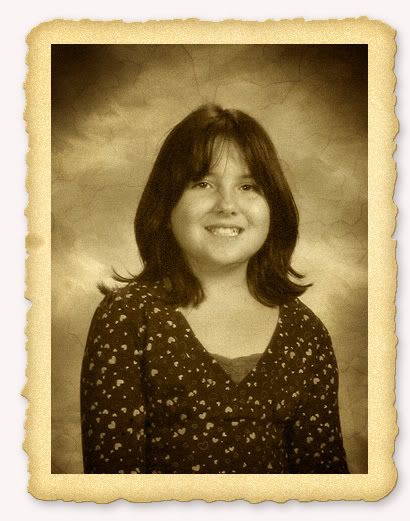
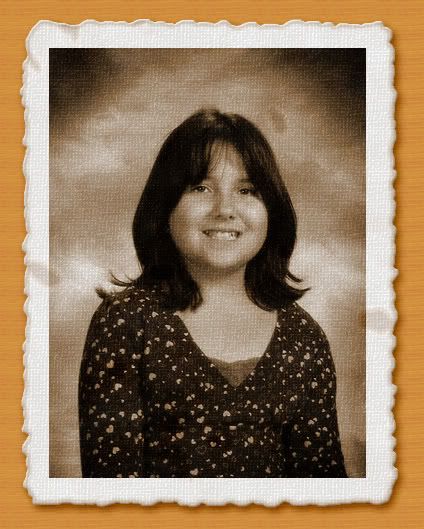
B & W UNDER TINT: Download B & W Under Tint Action Here
1. Open your photo
2. Load BW Under Tint into the actions palette.
3. Click the down arrow next to the actions name, then click on BW Underex Tint and push the play button.
4. Push Continue after the discription message comes up.
5. The next message that come up is an option for you to change the Saturation of the picture. He suggests leaving it as is and just pushing continue, but instead of a saturation of -50 as suggested, in my example, I changed the saturation to -10. Push the Continue button to make your choice, then push the OK button.
6. The next message that pops up is an option for you to change the photo darker or lighter, or just accept the defaults if you like how it looks. Take note of all the default numbers in each section, then you can play around with the sliders to get a look that you like. Push Continue to make your choice.
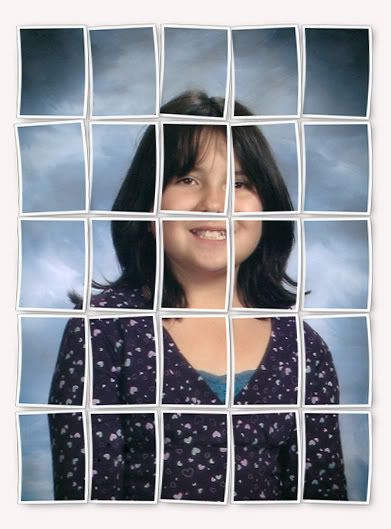
B & BIG PICTURE by Panos: Download B & Big Picture Action Here
* This actions works with a Landscape, not a Portrait picture. If your picture is a portrait, just go up to the Image tab, down to Rotate Canvas, then click on
90°CW. When the action is finished, you can rotate it back to it's portrait position by repeating the steps but choose 90°CCW this time. Also, you can only have one image open while running this action. Close all other images except the one you are using this action on.
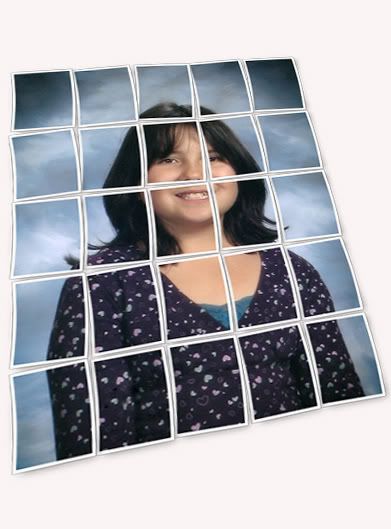
* This action has 4 different types to choose from. The first is B & Big Picture. It gives you a straight, broken up picture like in the first example below. The 3 others are called Perspective 1, 2 and 3. They each do the same, only they are slightly skewed in different ways. The second example picture above is Perspective 2. You must first run the B & Big Picture action on your photo before you use any of the other 3 perspective actions.
1. Open your photo.
2. Load B & Big Picture in the actioins palette.
3. Click on the down arrow next to it's name, then click on The B&Big picture below Copyright and push the Play button.
4. When it's finished, you can move or rotate ect... each individual section by clicking once in the layer palette on which ever piece you want to make changes to.
CLOUR VINTAGE PHOTO by JennyW: Download Coloured Vintage Photo Action by JennyW Here
She did an amazing job creating this action and I wish she would do some more. It's very real and lifelike. This works best on photo's bigger than 200 pixels in size.
The first action called Aged, will tint your photo, give it some cracks and stains, and put a jagged border around your picture.
The second action called Colour, will do all the same things as above, but it will also put a green tint to the background of your photo.
The third action called Bending, will bend your photo a slight curve to it.
The fourth action called Cracks, will put cracks in your photo and also give you the option of having a piece of your photo torn away.
You can use just one or a few of these in combination with each other to get amazing looking photos.
This is Just Aged:
1. Open up your photo.
2. Load Colored Vintage Photo by JennyW in the actions palette.
3. Choose Ageing and push play.
This is Aged and Bend:
Make sure the layer called Photoedge is highlighted in the layer palette.
1. Click on Bending in the action box.
* I got a popup telling me that "some aspects of the effect cannot be reproduced with layers". I just clicked ok and it was fine.
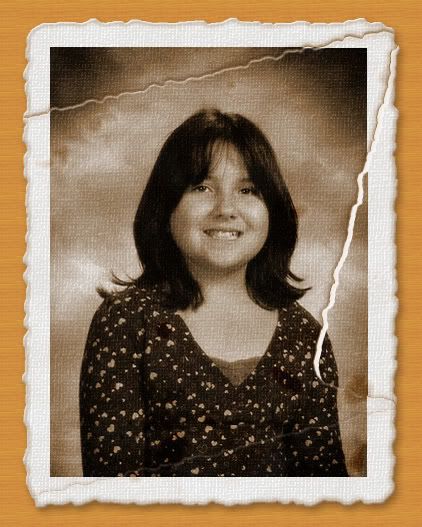
This is Aged and Cracks:
Make sure the layer Photoedege is selected in the layer palette.
1. Click on Cracks.
2. Next, you will get a message that says "rotate and move the selection to your desired position then hit Enter". Push the Continue button.
3. You will see a rectangle bounding box over some marching ants. The marching ants is going to be where your cracks/rip appear. You'll see from my example photo above that i only wanted one crack/rip going diagonally across the top of my image. I dragged the middle of the bounding box at the bottom off of my picture completely to get just the one crack. Set yours how you want it then push the Enter key on your keyboard.
4. Next, another message box pops up. This is if you want a piece of your image to appear as if it is torn away from the actual photograph. Push Continue if you want this effect, or push the Stop button to finish and leave it as is.
5. If you pushed Continue, you will see another bounding box over some marching ants. Move one of the little square nodes to make whatever size of the image you want to be torn away. You can use the arrow keys on your keyboard to nudge up, down, left or right.
6. When satisfied, push the Enter key.
This is Aged and Coloured:
This one is very simple, just select Colour in the actions box and hit play.
OLD PHOTO: Download Old Photo Action Here
This next action is also by the same creator, Jenny. It's called Old Photo, and it also has 4 different actions: Ageing, Cracks, Vertical Bend, and Horozontal Bend. It gives your photo a stained and aged look, with a very nice border, and it has a canvas type texture.
Aged Photo:
1. Open your image in PS.
2. Load Old Photo by JennyW in the actions box.
3. Click on Ageing.
4. When the ageing has finished, read the message that pops up and push the Stop button.
This is Aged and Cracks:
* After having my photo aged, I had a bit of trouble getting any of the other 3 actions to run properly. Every time I tried, it would give me an error message saying the cut command is not available, the move command is not available ect...... and when it finished, I ended up with a blank white square for my image. So, what I did was, I deleted the entire group of layers called All Layers. Click the group once to highlight it, then at the bottom of the layer palette you'll see a garbage can icon, click that. You may get a popup asking "Delete the group All Layers and it's contents or delete only the group? Click group and contents.
* Next delete the layer called Background too or you'll end up with a plain white square as well.
1. Make sure the layer called Old Photo is highlighted and go up to the actions box and click once on Cracks and hit the Play button.
*You will get a popup asking you to move the selection to your desired position. This is going to give you the option of making a couple of cracks in your photo. You will see a diagonal rectangle of marching ants over your image.
2. Press the STOP button on the message popup to pause the action and make our changes. You have 3 options next. First.....
a) If you want to seperate the top or bottom piece slightly from your image, have your Mover tool selected. Click once inside the rectangle of marching ants and drag downwards, upwards, or sideways, depending on what you want.
* Keep in mind that you can use your arrow keys on your keyboard to nudge your selection one pixel in any direction, just keep pushing the arrow to nudge. Push the Play button in the actions box when you are done.
OR....
b) Select your Rectangular Marquee tool on the tool palette on the left ( it is the very first icon). Then click on the middle of your photo and drag the rectangular marching ants around your photo and position it where you want. Whatever part of the marching ants are on your photo, that is where cracks will appear.
When satisfied with what you have, push the Play button again in the action box on the right.
OR....
c) Just hit Continue to accept the default cracks.
* This next part allows you to seperate a section from your photo. Have your Rectangular Marquee tool selected.
3. Click inside the marching ants, and move it around on your photo untill you find a position you like. Whatever part of your image is inside the marching ants, then that section will be slightly moved a few pixels away from your image, giving it a torn away look.
Push the Play button in the actions box when you have what you like.
This is VERTICAL BEND:
1. Click on Vertical Bend in the actions box and hit play.
* I got a popup saying "the command Unlink is not currently available". It's fine, just hit Continue.
* Another popup saying " the object layer background is not currently available." Again, hit Continue. It still works fine.
2. In the layer palette, just move the Shadow layer under the Old Photo layer.
This is Horozontal Bend:
Follow the same instructions as in the Vertical Bend from above.
GLAMOUR PHOTO: Download Glamour Photo Action Here
Just open your photo and push Play. I actually ran this action on the photo twice, merged visable layers, then use the unsharpen mask at the defaults. (Filter tab, Sharpen, then unsharp mask.)
STANDING PHOTO: Download Standing Photo Action Here
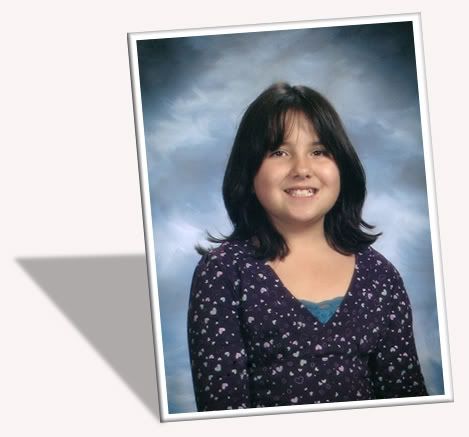
This has the option for using a Landscape or a Portrait photo. Just select which one you want and push the play button.
You will be asked to scale the layer effects, push the Continue button to do this. I left mine at the default 99.
Next, you will be asked to select a gaussian blur size for your photo. Read the information, and push the Continue button and make your selection.
SCOTCH TAPE: Download Scotch Tape Action Here
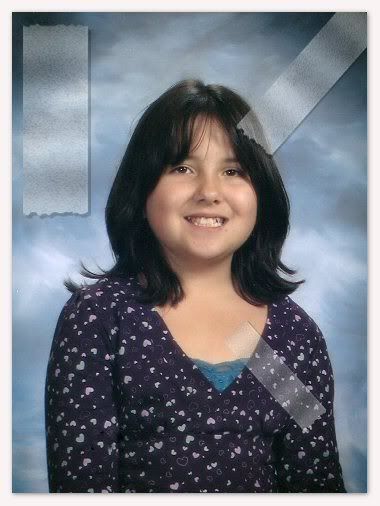
No need to have a photo opened for this. Just push Play and the action will open a new canvas of its own.
If you select the Mover tool or the free transform tool, you can make it bigger, smaller, skinny or fatter. Use the free transform tool to rotate it.
Deck by Panos: Download Deck Action by Panos Here
Very simple to use Load either Landscape or Portrait and just open your photo and push play.
Discrete by Panos: Download Discrete Action by Panos Here

This will put a white border around your photo with the option to change the colour and drop shadow.
Puzzle by Panos: Download Puzzle Action by Panos Here
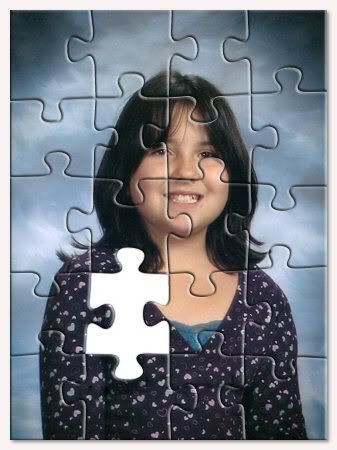
You can choose to make your photo break into 4, 6, 20, 30, 56, or 100 puzzle pieces, and it gives you the option to change the bevel of the pieces as well. This runs on a Landscape image, so if yours is a portrait, go up to the Image tab, down to Rotate Canvas, then to 90°CW. You can rotate it back when the action has finished.
Just push play and follow the brief instructions
STAMP by Panos: Download Stamp Action by Panos Here
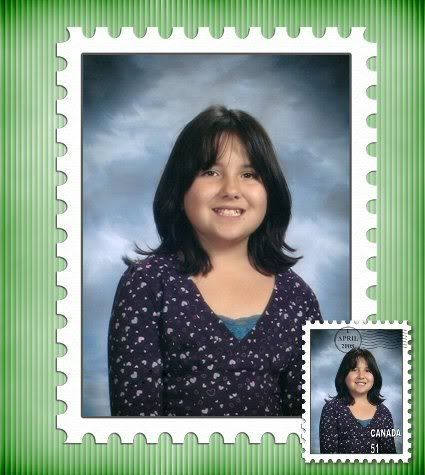
This uses a landscape picture format. Your image needs to be rotated 90°.
* This uses the enter key that is on your numeric keypad, not the regular enter key you would normally use.
When it gives you the option to change the country and number, press Continue to do this.
Make your changes then press the Enter key that is on your NUMBER PAD on your keyboard.
Next, it will give you the option of changing the date that appears on the stamp. Press Continue and then do this.
The next popup will ask you to change the colour of the country and number. Press Continue and then do this.
Next is the option to scale or rotate the stamp. Press Continue and make your changes.


Thank you for all the wonderful information. Everytime I visit your Blog I learn something new.
Thank you again!