1. Start by opening up SK Blue for Tut.png from the zip.
2. Create a new layer over this one. Go up to the Layer tab, choose New, then Layer and click OK.
3. Set your foreground to whatever colour you want as your tear. I will be using a very pale blue #e3edf9.
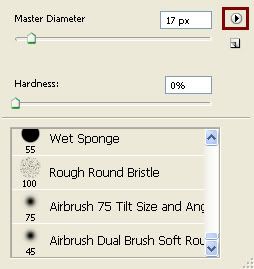
4. Click on your brush tool and click the down arrow on the brush preset picker at the top. From the flyout click on the arrow that is pointing to the right like in the picture below:
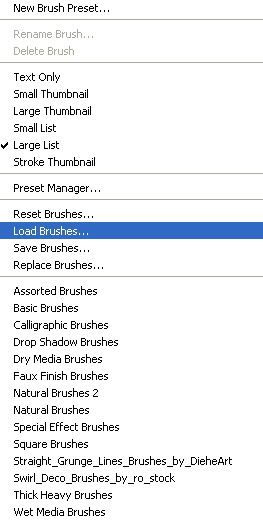
5. A box will pop up, choose Load Brushes. Navigate to where you have saved my SK Rough Edges of Brush.abr brush and click it once to highlight it, then click the Load button.
6. Scroll down to the end of the brushes and double click on SK Rough Edges of Square to select that brush.
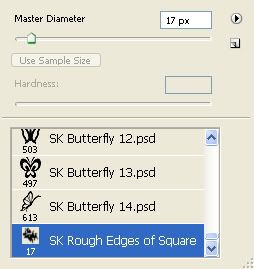
* You'll notice that the brush size is 17 pixels. If you want it smaller, just use the slider.
7. Make sure your blank layer is the active layer ( it should be highlighted blue, if it isn't just click it one time) Starting at the top right hand corner, move your cursor downward to make your paper tear line.
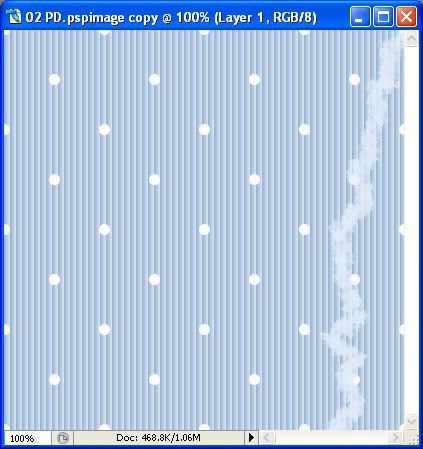
* Be sure to start at the very top, and end at the very bottom, leaving no spaces.
8. Working on Layer 1, next, select your magic wand tool from the left, ( it is the second icon in the second row) and click once on the part of the paper that we want to delete. I have my tolerance set to 20, anti-alias and contiguous is checked.
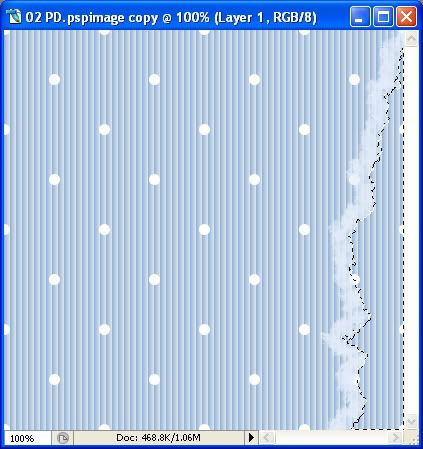
9. Click once on the blue paper layer in the layer palette, then hit your delete key on your keyboard. The unwanted section should now be deleted.
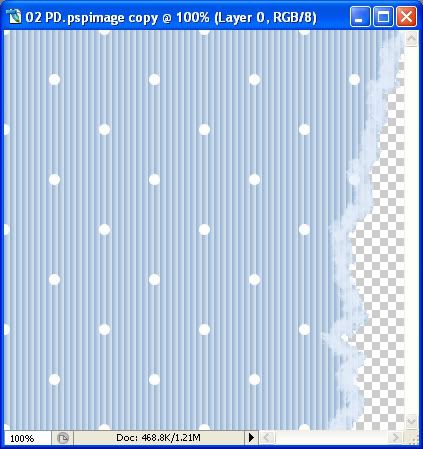
* Now we need to put a little bit of a texture on it.
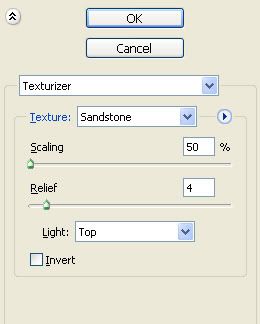
10. In the layer palette to the right, click once on Layer 1 to make it our active layer. Next, go up to the Filter tab at the top, then down to texture, then to texturizer. Use these settings, or choose one of your own:
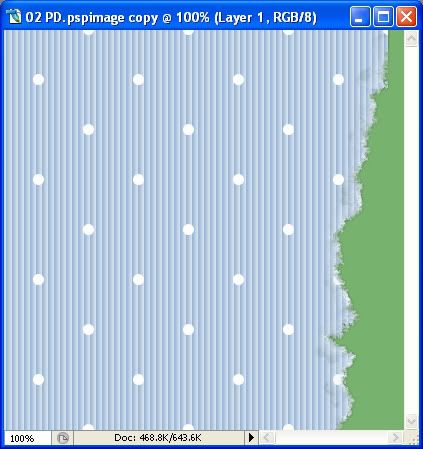
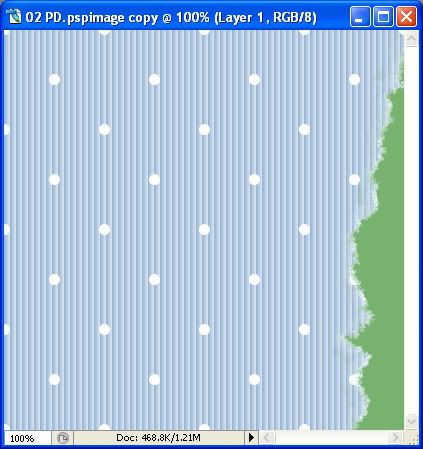
11. In the layer palette on the right, drag and move Layer 1 down below your blue paper layer. You may need to select your mover tool first, and push the torn line on your canvas over to the right a bit before moving that layer below the blue paper, or its going to disappear completely behind the blue paper layer.
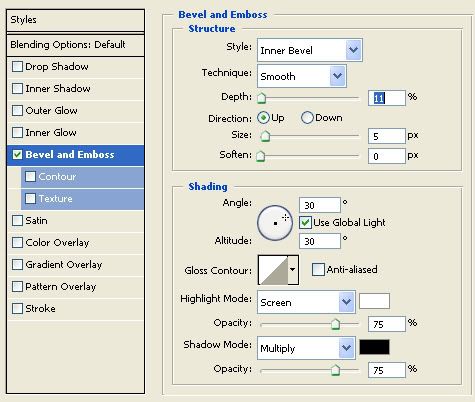
12. You can give your torn line a slight bevel if you wish as well. With your torn line layer selected, in the layer palette on the right, down at the bottom you will see a circle icon with the letter f in the middle. Click on that, then select Bevel and Emboss. Leave everything at it's default but change the Depth to anywhere from 1 to 12 and hit OK. I chose 11.
13. Still working on your torn line layer (layer 1), use your mover tool and place it into whatever position you think looks good. I've placed a green background on mine so you can see how mine turned out so far. *Tip: You can use your arrows on your keyboard to nudge your torn line into place a little bit at a time.
14. You can also use your eraser tool to soften the edges of your blue paper line where it meets the torn edge. Just select a soft round brush and set the opacity to something very low like 15 to 18 percent. Click on your blue paper layer to make it active, and start erasing the edge to help it blend in with the new torn edge.
15. When you are satisfied with how it looks, go up the the Layer tab and then down to Merge Visable.
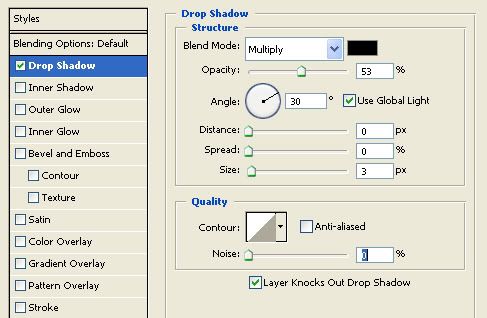
16. Give it a drop shadow as well. Click once on the circle with the letter f in it at the bottom of the layer palette and choose drop shadow. These are the settings that I used:
And here is my final result: