
My egg shapes which you can find on my blog Here
My layer styles which you can get Here
1. Open a 400 x 400 transparent image, or whatever size you choose.
2. Click on your Custom Shape tool on the left, then go up to the tool bar at the top of the page. Where it says Shape, click the down arrow.
3. Click the arrow that is pointing to the right, and then choose Load Shapes. Navigate to where you downloaded the egg shapes (SK Ovals 2008.csh) and click on the Load button. You should now have 6 oval egg shapes in the shapes box.
4. Double click on the second to last one to activate it.
5. Hold down the Shift key, and starting from the top left corner, drag downwards to draw out your egg.
6. In the layer styles box on the right, click the arrow pointing to the right, and from the flyout choose Load Styles.
7. Navigate to where you saved my layer styles, and choose SK Baby Blue Panned Egg.asl click it once to highlight it, then click the Load button.
8. In the Layer Styles box on the right, click once on the new layer style. Your egg should now look like the picture below.
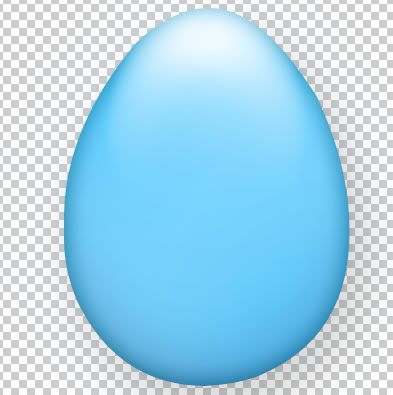
* To change the colour, at the bottom of the layer palette, click the grey circle with the letter f in the middle to bring up the Layer Styles box. You will need to change the colour overlay, outter glow, and inner shadow.
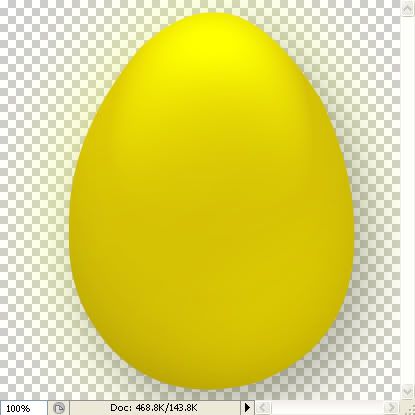
SK Golden Egg:
SK Darker Pink Shiny Egg:

Go Here to learn how to use patterns on shapes.


Thank you for another great tutorial. I really appreciate all you do so others can learn.
Robin