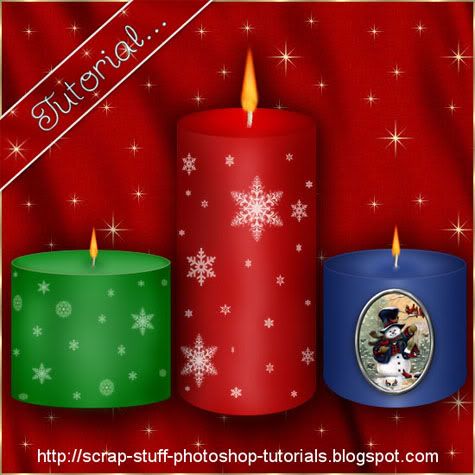
Supplies: Download Here
1. Open up a 500 by 500 transparent image.
2. Set your forground to black.
3. Click on your Custom Shapes tool on the left and set it to a basic circle. Drag out an oval for the top of your candle.
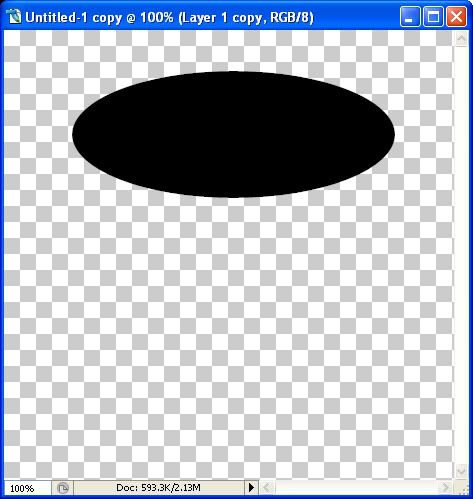
* If you don't have a basic circle, instead, click on your Elliptical Marquee tool and draw out an ellipse, then flood fill it with black. Then deselect from the selections tab.
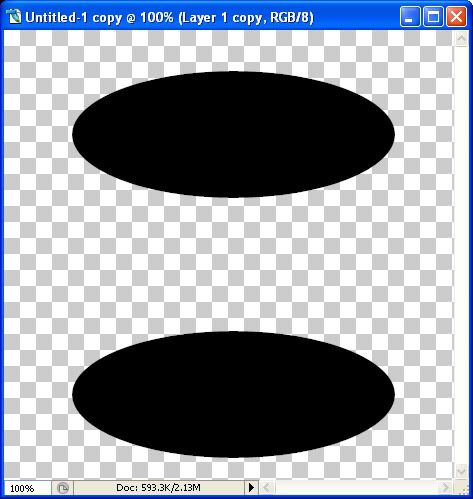
4. Duplicate this layer by right clicking on it in the layer palette and choose Duplicate Layer. Make sure you are not right clicking on the Icon, but on the layer itself.
5. Click on your Mover tool on the left to activate it, then use your down arrow key on your keyboard to move this second oval to the bottom of your canvas.
6. Click on your Custom Shape tool on the left and set it to a basic rectangle.
* If you don't have a rectangle, use the Rectangular Marquee tool on the left, draw it out, then fill with black and deselect.
7. Create a new layer by going to the Layers tab, choose New, then New Layer.
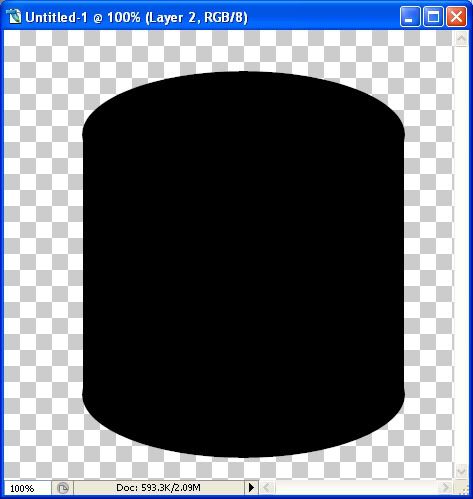
8. Draw out a rectangularish square that meets both ends of your 2 ovals.
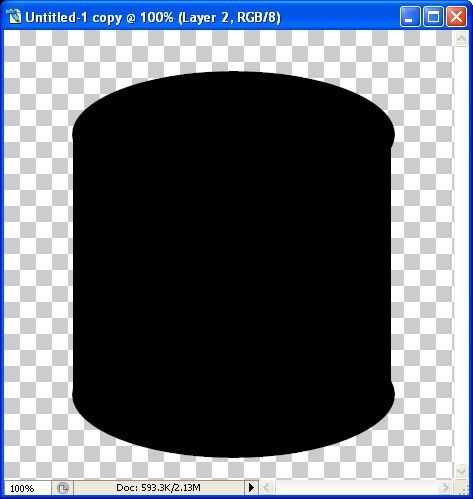
* You'll notice that my square doesn't quite meet the right side of my 2 ovals like it does on the left. If you can't get yours to meet properly, hold down your Ctrl key on your keyboard and hit the t key. This will bring up a bounding box and you can click on the node and pull your square out. This gets tricky sometimes and won't pull to where you want it exactly, so if it goes past the ovals, leave it, and click on your Rectangular Marquee tool, select the portion that is over, then hit the Delete key on your keyboard.
This is what you should have now:
9. Hide the top oval by clicking the eye icon next to it in the layer palette.
10. Right click on one of the 2 remaining layers and Merge Visable.
* Keep the top oval hidden for now.
11. Hold down your Ctrl key on your keyboard and click on the ICON of the candle base in the layer palette. You'll get the marching ants all around it.
12. Make a new layer by going up to the Layer tab, over to New, then to Layer. This should be above your black base in the layer palette.
13. Set your foreground to a dark blue 081a50 and your background to a lighter blue 415ba5.
14. Click on your Gradient tool on the left. It may be hidden behind the Paint Bucket tool.
15. Now go up to the top of the screen and you'll see the blue gradient option. Click the down arrow beside it and choose the first gradient called foreground to background. Set the gradient style to Reflected Gradient, Mode is Nornal, Opacity is 100%, Reverse, Dither, and Transparency are all checked.
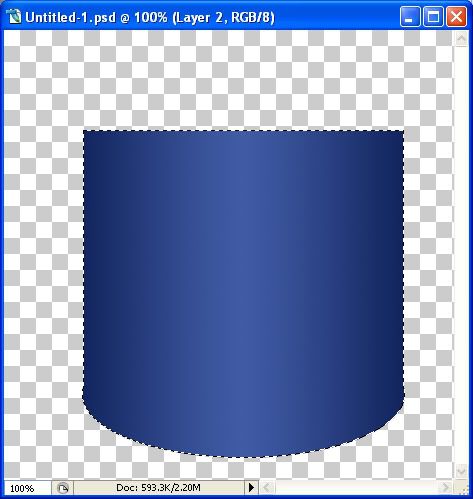
16. Working on your blank layer, put your cursor in the middle of your black candle base on your canvas, hold down your Shift key, drag left and stop when you get outside the marching ants on your canvas. This is what you should have now:
17. Go up to the Select tab and choose Deselect.
18. In the layer palette, right click on the black candle base layer and choose Delete Layer.
19. Unhide the top oval layer from the palette, hold down your Ctrl key and click on the icon to get the marching ants.
20. Make a new layer above it, ( layer tab, new, layer) and drag this layer to the top of the pile in the palette.
21. Click on your gradient tool and repeat step #16.
22. Deselect that layer from the Select tab.
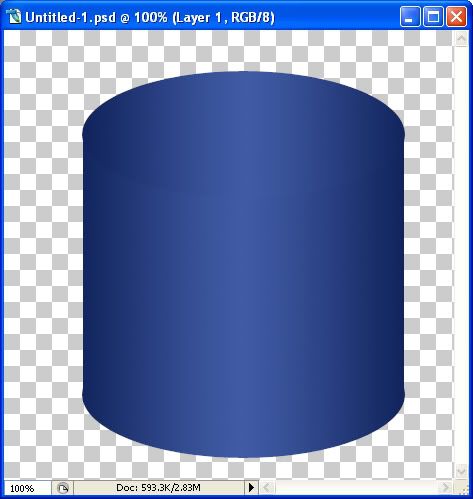
23. In the layer palette, delete the black oval layer. This is where you should be now:
24. Working on your oval top layer, click on the layer style icon at the bottom of your palette. It looks like a grey circle with and f in the middle. Choose Inner Shadow and use these settings:
blend mode: luminosity, black for colour
opacity: 40%
angle: 120 and global light is checked
distance: 5
choke: 0
size: 35
25. Now click on Inner Glow on the left hand side and use these settings:
blend mode: screen
opacity: 30
noise: 0
colour: 4648bd
Elements:
technique: softer
source: edge
choke: 59
size: 5
and click OK
This is how it should look:
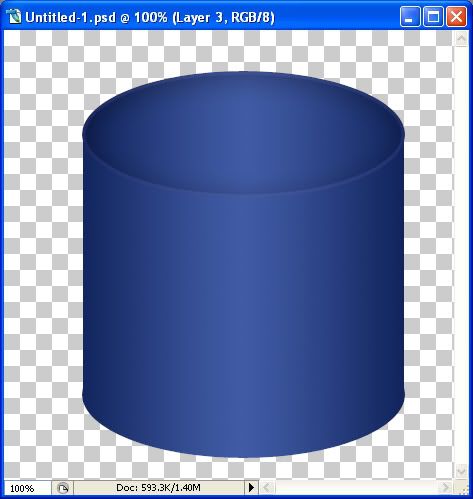
* Now, the top oval looks too large so we are going to scale it down a little.
26. In the layer palette, click on the top oval to make it our active layer. Hold down the Ctrl key and then hit the t key on your keyboard. You will get a bounding box with square nodes on it.
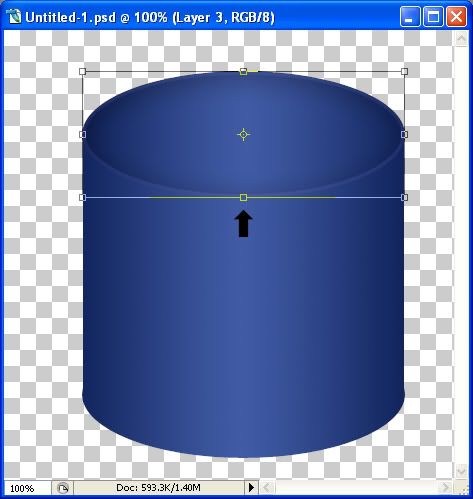
27. Put your cursor on the node indicated by the arrow and drag it upwards untill it looks like the one in the picture below. You may need to drag it down a bit to fit back on your candle properly as well.
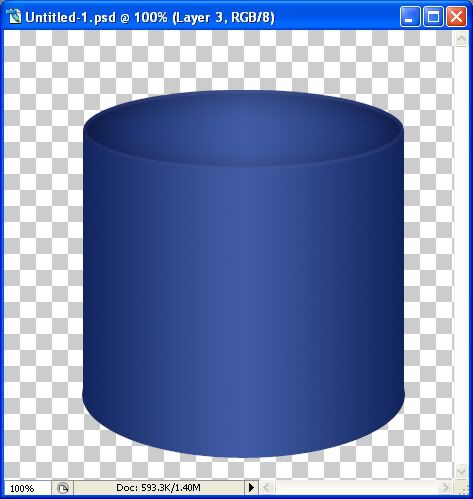
28. Make a new blank layer and drag it in between the top and candle base layers.
29. Set your foreground to white, and click on your Brush tool on the left, and set it to Soft Round 17 pixels.
30. Hold down your Ctrl key and click on the icon of the blue candle base layer in the palette. You'll have your marching ants around your candle base, but make sure the blank layer is the highlighted layer in the palette.
31. Hold down your Shift key and drag out a straight line with your brush from top to bottom in the middle of your candle.
32. Next, go up to the Filter tab, down to Blur, then to Gaussian Blur and set the Radius to 20.5 and click OK.
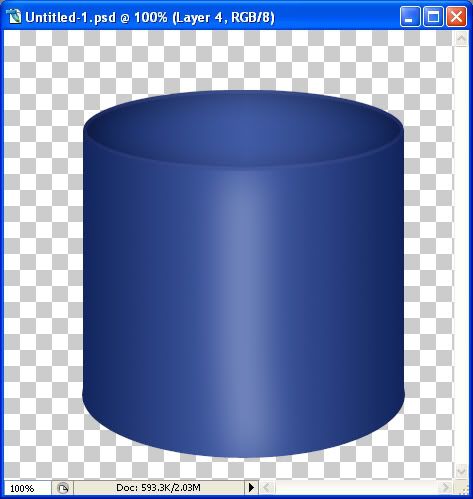
33. Open up SK Wick from the supplies folder, resize it in proportion to your candle (about 50%) and place it in the middle of your candle.
34. Click on your Eraser tool on the left, brush size about 13 and opacity around 16% and click once or twice around the bottom portion of the wick, till it's a little see through.
35. Use your paint brush to paint a little bit of blue over the bottom portion of the wick so it looks like it's blended into the candle itself. Do this on a new layer. You may want to try lowering the opacity of the paint layer a little.
36. Open up SK Flame from the supplies folder. With your Mover tool, drag it over onto the top of the wick.
37. Right click on one of the layers in the palette and Merge Visable.
38. Make a new layer and decorate with brushes, wordart, tubes, ect......
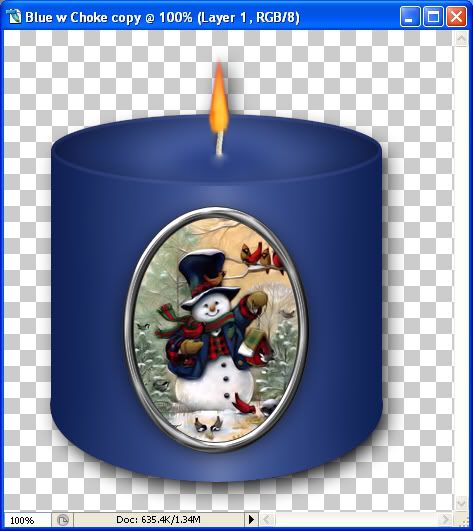
TOU:
If you do this tutorial, your end result is yours to do whatever you wish; give it away as a freebie, use it as part of a kit, or sell it for profit. You may not make this into an action or script to give away as a freebie or to sell for a profit. A mention or a link back here would be appreciated but is not mandatory. Please do not share the supplies or tut through email or any other means. If you are using this or any of my tutorials for your groups or as part of your own tutorial, please post a link to the tut on my blog and let your members download the supplies from my blog for themselves.



THank you so much for these wonderful tutorials! Now I can make my own candles and ornaments - I am so excited about this.
From a fellow Canadian thank you from the bottom of my heart for providing tutorials - this is what I really love, being able to make something myself!