

Supplies: Download Here
** It is important that you DO NOT resize the ball template before you do this tutorial because we will be applying layer styles, and it will not turn out looking the same if resize beforehand. You can resize it after it is finished.
1. Open up SK Ball Template from the supplies zip.
2. Go up to the Image tab and choose Duplicate, click OK from the popup then close out your original Ball Template.
3. Add a new layer by going to the Layer tab at the top and click New, then Layer.
4. Set your foreground colour to 800000.
5. Click on your Paint Bucket tool on the left and fill your new layer with the red colour.
* Now we are going to use a very simple clipping mask to merge the red colour onto our round shape.
6. Hold down your Ctrl and the Alt key on your keyboard, and then hit the g key.
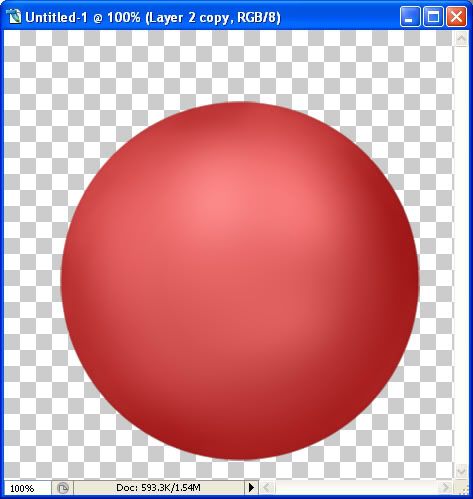
* You should now have a solid red circle on your canvas. And your layer palette should look like this.

7. Click once on the red layer to make it the active layer and then change the Blend Mode to Colour.

* This is what yours should look like now. Kind of a metalic rose colour.

8. Right click on one of the layers and from the flyout choose Merge Visable. Make sure not to right click on the icon, click on the layer itself.
* Some other time when doing this tut again, you can experiment by following these next 3 steps to give you different results.
~~~
Create a new layer above the merged layer ( Layer tab, New, then Layer) and fill it with the same red colour as before.
Create a Clipping Mask by holding down your Ctrl and Alt key and hitting the g on your keyboard.
Change the Blend Mode this time to Overlay, Lighten, or Soft Light, then merge visable. Experiment and see what looks good.
~~~
9. Hold down your Ctrl key and click once on the ICON of the merged ball in the layer palette.
* This creates a selection around your image and you should have marching ants all around your ball.
10. Duplicate this image by right clicking on the layer in the layer palette and choosing Duplicate Layer and click yes when you get the popup.
* You should now have 2 layers exactly the same in the layer palette.
11. Go up to the Filter tab at the top and down to Blur, then over to Gaussian Blur. In the Radius section, type in 20.00 and click OK.
12. Go up to the Select tab and choose Deselect. This is what you should have so far:

* Now it needs a bit of shading so we are going to add a layer style to the outter edges. Make sure the top duplicated copy is highlighted blue in your layer palette. Click it once if it isn't.
13. At the bottom of your layer palette, you will see an icon that looks like a grey circle with an f in the middle. Click on that, and from the flyout click on Inner Shadow. Change your settings to the same as in the picture below:

* Yours should now look like this:
14. In the layers palette, right click on one of the layers and choose Merge Visable.
* Now we are going to put a second burn on it.
15. Click the layer styles icon again at the bottom of the layer palette and choose Inner Shadow. Use the settings below:

* This is what yours should look like now:

16. Make a blank layer by going up to the Layer tab, then to New, then over to Layer and click OK at the popup.
17. Right click on one of the layers and choose Merge Visable.
* You'll notice that there was a little layer styles icon at the end of your ball layer but it is now gone. That's what merging the ball layer with the blank layer did.
18. You may need to expand your canvas in order to have enough room to put the topper on it, so go up to the Image tab and down to Canvas Size. In the New Size section, click the down arrow to the right of the Width and choose pixels. Change the Height to 650 pixels and click OK.
19. Open up SK Topper 01 from the supplies folder and use your Mover tool to drag it onto the top of your ball.
20. When it is placed where you want it, righth click on one of the layers and Merge Visable.
TOU:
If you do this tutorial, your end result is yours to do whatever you wish; give it away as a freebie, use it as part of a kit, or sell it for profit. You may not make this into an action or script to give away as a freebie or to sell for a profit. A mention or a link back here would be appreciated but is not mandatory. Please do not share the supplies or tut through email or any other means. If you are using this or any of my tutorials for your groups or as part of your own tutorial, please post a link to the tut on my blog and let your members download the supplies from my blog for themselves.


Thank you! Your blog post will be advertised on the DigiFree Digital Scrapbooking Freebie search engine today (look for timestamp: 26 Nov [LA 09:00pm] - 27 Nov [NY 12:00am, UK 05:00am, OZ 04:00pm] ).